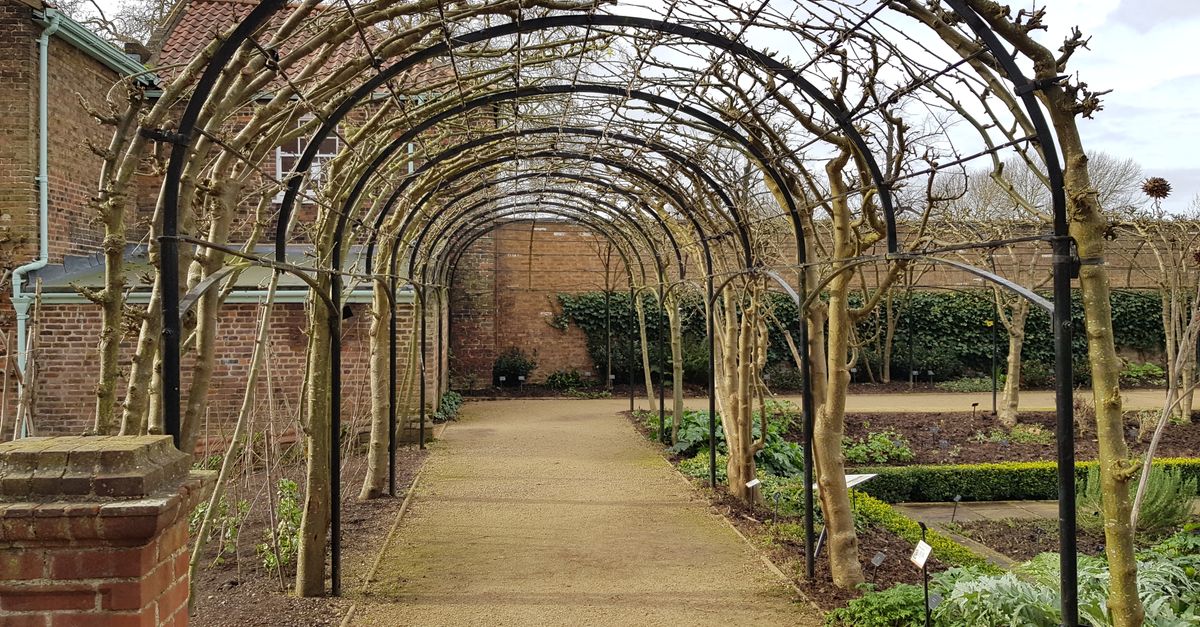
Every spring, I see it: eager gardeners, myself included, meticulously planting climbing roses, sweet peas, or vigorous tomato vines, and then — almost as an afterthought — staking up a flimsy, store-bought trellis. We picture abundant blooms or heavy harvests, only to watch, usually around mid-season, as the whole structure buckles, collapses, or just plain gives up under the weight of healthy growth. It’s a frustrating cycle that wastes time, money, and often, the plants themselves. I’ve been there, picking up broken stems and trying to salvage a season, vowing each time to do better.
What changed everything for me wasn’t just buying a ‘sturdier’ trellis, but fundamentally understanding why these structures fail and what truly constitutes lasting support. It’s not always about sheer material strength; often, it’s about overlooked design principles, improper installation, and underestimating the sheer force of a thriving plant. After years of trial and error in my own garden, from nurturing delicate clematis to wrangling sprawling cucumbers, I’ve learned that a successful trellis isn’t just an accessory; it’s an integrated part of your garden’s architecture.
This isn’t about expensive solutions, but smart ones. It’s about designing for growth, anticipating challenges, and giving your climbers the stable foundation they truly need to flourish.
Key Takeaways
- Most garden trellises fail due to inadequate anchoring, undersized materials, or improper design for the plant’s growth habit.
- The critical first step is assessing your plant’s mature size and weight, then selecting a trellis material and design that can comfortably exceed that demand.
- Proper installation involves deep, secure anchoring into the ground or firmly attaching to a substantial structure, accounting for wind and soil conditions.
- Investing in thoughtful design, whether DIY or purchased, and using appropriate hardware will save you immense frustration and plant loss long-term.
Underestimating the Plant’s Power: Why Small Trellises Are a Setup for Failure
The biggest mistake I see, and one I made repeatedly in my early gardening days, is a fundamental misjudgment of the plant itself. We look at a tiny seedling and forget it’s destined to become a sprawling, leafy, and often heavy organism. A single mature tomato plant, laden with fruit, can weigh 15-20 pounds or more. A vigorous climbing rose or wisteria, over a few seasons, can easily exert hundreds of pounds of force. Many commercially available trellises are designed for aesthetics or light annuals, not the robust demands of a thriving garden.
In my experience, you must always design for the plant’s mature size and weight, then add at least 25% more structural integrity for good measure. Consider these factors:
- Growth Habit: Does your plant twine, clamber, or latch? Twining plants (like beans, peas) need thin supports they can wrap around. Clambering plants (like roses, some clematis) need larger structures to which branches can be tied. Latching plants (like grapes, passionflower) have tendrils that need something to grip. A grid is great for gripping tendrils, but a rose needs substantial horizontal bars to be tied to.
- Vigor: Some plants grow rapidly and become incredibly dense. Cucumbers, for instance, put on weight quickly once fruiting begins. A trellis that looks perfectly adequate at planting time can be utterly overwhelmed by July. Always check the mature dimensions and growth habits of your specific cultivar.
- Weight Distribution: A heavy fruiting vine, like a pumpkin, will put concentrated weight on specific points. A trellis with widely spaced supports or weak joints will inevitably buckle under this focused stress. Think about how the weight will be distributed across the structure as the plant grows.
What changed everything for me was shifting my mindset from what looks nice and is easy to install to what will *actually* support this plant at its peak? This often means thinking bigger, stronger, and more strategically than initial instincts suggest.
The Fatal Flaw: Inadequate Anchoring and Installation
Even the sturdiest trellis material is useless if it’s not properly anchored. This is where most DIY and many pre-made trellises fail spectacularly. I’ve seen countless instances where gardeners simply push a trellis into the soil a few inches, only for it to fall over in the first strong wind or as the plant gains height and leverage. It’s like building a beautiful house on a foundation of sand.
Here’s what I’ve learned about proper anchoring:
- Depth is Key: For any substantial plant or tall trellis, a few inches of soil penetration is insufficient. Trellis posts should ideally be buried at least 18-24 inches deep, depending on the height of the trellis and soil type. For very tall or heavy-duty structures, you might even consider concrete footings, especially in loose or sandy soil. I always use a post-hole digger, not just a shovel, to ensure adequate depth and a tighter fit.
- Secure Fastening: If your trellis is leaning against a wall, fence, or arbor, it needs to be securely fastened at multiple points, not just propped. Use appropriate outdoor-grade screws, bolts, or heavy-duty ties. Don’t rely on thin wire or twine that will degrade or break. I learned this the hard way when a beautiful clematis, carefully tied to a seemingly secure arbor, ripped away from the flimsy eye-hooks in a summer storm.
- Lateral Support: Tall, narrow trellises are inherently unstable. They need lateral support to prevent swaying and tipping. This can come from angled bracing posts, or by being securely attached to a wider, more stable structure. Think of a tripod versus a single pole; the former is much more stable.
- Wind Load: Never underestimate wind. A full-grown vine acts like a sail, catching wind and exerting immense leverage on its support. Your anchoring needs to withstand not just the plant’s weight but also significant wind force. If you live in a windy area, this consideration moves to the top of your list.
My personal rule now is: if I can easily wiggle the installed trellis, it’s not secure enough. I apply significant force to test stability before the plant starts climbing.
The Weakest Links: Material Choices and Joint Failure
Many trellises are constructed with materials that are simply not up to the task, or with joining methods that are designed for light loads, not long-term outdoor stress. This is particularly true for wooden trellises that use staples, thin nails, or weak glue.
Here’s my breakdown of common material and joint failures, and what to do instead:
- Thin Wood Lattice: While aesthetically pleasing, the classic thin wood lattice (often 1/4-inch or 1/2-inch thick strips) is perhaps the most common culprit for collapse. The individual strips break easily, and the stapled joints fail rapidly under stress or weathering. For wood, opt for pressure-treated lumber, cedar, or redwood, with at least 1x2 inch (or larger) dimensions for the main frame and crossbars.
- Plastic/Vinyl Trellises: While some high-quality vinyl trellises exist, many are made from brittle plastic that degrades in UV light, becoming weak and prone to snapping. They often lack the rigidity to support heavy plants long-term.
- Thin Metal Wire/Mesh: Similar to thin wood, fine metal mesh or wire can be too delicate. It rusts, bends, and snaps. For metal, look for thicker gauge steel (powder-coated for rust resistance) or sturdy aluminum. Rebar, while utilitarian, can make excellent heavy-duty supports if anchored correctly.
- Joint Construction: This is a crucial, often overlooked, point. Simple butt joints held with small nails or staples are destined to fail. For DIY wood trellises, I exclusively use exterior-grade wood screws (stainless steel or ceramic coated) and often reinforce with waterproof wood glue at every joint. Mortise and tenon or lap joints are even better for robustness. For metal, welding or heavy-duty bolted connections are far superior to flimsy clips.
Always examine the connections. If a trellis feels flimsy at the joints, it will fail there first. Don’t be swayed by pretty pictures; focus on the underlying construction.
The Overlooked Enemy: Weather and Soil Degradation
Your trellis isn’t just fighting gravity and your plant’s enthusiasm; it’s constantly battling the elements. Rain, sun, frost, and soil moisture all conspire to weaken its structure over time. This is especially true for trellises with wooden posts directly in the ground.
- Wood Rot: Wood posts buried directly in soil, unless properly treated or naturally rot-resistant (like cedar heartwood), will rot over time. This compromises anchoring and leads to collapse. To prevent this, either use pressure-treated lumber, char the bottom of the posts (an old but effective technique), or set untreated posts in concrete. Alternatively, use metal post anchors that keep the wood slightly above ground.
- Rust and Corrosion: Metal trellises, if not properly coated or made from naturally rust-resistant materials (like aluminum), will corrode. This weakens the metal, leading to breaks. Look for powder-coated steel or galvanized options for longevity. Even then, inspect regularly for chips in the coating that expose the metal underneath.
- Soil Movement: Freezing and thawing cycles can cause soil heave, gradually pushing posts out of the ground. Saturated soil can also lose its grip on posts. This is another reason deep anchoring and perhaps concrete footings are so important in areas with harsh winters or heavy clay soils.
- UV Degradation: As mentioned with plastic, sunlight (UV radiation) breaks down many materials over time, making them brittle and weak. Choose materials known for UV resistance, or be prepared to replace them more frequently.
Regular inspection is key. A small crack or rust spot caught early can be repaired before it leads to a catastrophic collapse. Think of your trellis as an outdoor piece of furniture; it needs maintenance to last.
The Path to Lasting Trellis Success: Strategic Design & Installation
So, what actually works? It comes down to a proactive approach, informed by the plant’s needs and environmental realities. Here’s my distilled advice for building or choosing trellises that genuinely last:
Know Your Plant, Then Double It: Before you even think about materials, research your specific plant’s mature height, spread, and weight. Then, select a trellis that is at least 1.5 to 2 times taller than the plant’s expected height, and robust enough to handle double its potential weight. This gives you buffer for vigorous growth and unexpected storms.
Anchor Like You Mean It: For in-ground posts, aim for at least 1/3 of the post’s total length to be buried, with a minimum of 18 inches. Use concrete for anything over 6 feet tall or for very heavy plants. For wall-mounted trellises, use heavy-duty stand-offs or brackets secured into wall studs or masonry with appropriate anchors. Never just lean it.
Choose Durable, Appropriate Materials:
- Wood: Use pressure-treated lumber, cedar, or redwood. Dimensions should be at least 2x2 inches for main posts and 1x2 inches for crossbars. Assemble with exterior-grade screws and waterproof glue. Paint or stain with exterior-grade products annually.
- Metal: Opt for thick-gauge steel (powder-coated or galvanized) or aluminum. Ensure all connections are welded, bolted, or crimped, not just lightly joined. Rebar or sturdy cattle panel can be excellent, affordable options for heavy-duty support.
- Netting/Wire: For edible vines, heavy-duty garden netting (like nylon or polypropylene) strung tautly between robust posts, or heavy-gauge galvanized wire, can work well. Ensure the posts are very strong and anchored deeply. Avoid thin plastic netting; it breaks easily.
Design for Accessibility and Maintenance: A good trellis not only supports the plant but also allows you to access it for pruning, harvesting, and pest inspection. Ensure there’s enough space between the trellis and any wall for air circulation and your hands. For tall trellises, consider a design that allows you to easily tie new growth as it emerges.
Build in Adjustability (if possible): For particularly fast-growing or heavy plants, having a system that allows you to add extra supports or adjust tension can be invaluable. This could mean pre-drilling holes for additional crossbars on a wooden trellis or having adjustable turnbuckles for wire systems.
By approaching trellis selection and installation with the same thoughtful planning you give to choosing your plants, you’ll avoid the frustration of collapsed structures and enjoy a season of flourishing, well-supported growth.
Frequently Asked Questions
Q1: What’s the best material for a garden trellis that will last for years?
A1: For longevity and strength, consider powder-coated steel, galvanized metal, or naturally rot-resistant woods like cedar or redwood, especially when pressure-treated lumber isn’t desired. High-quality, UV-stabilized vinyl can also last, but cheap plastic often degrades quickly. The key is robust gauge/thickness of the material and strong connections.
Q2: How deep should I bury trellis posts to prevent them from falling over?
A2: As a general rule, at least 1/3 of the total post length should be buried in the ground, with a minimum of 18-24 inches for most standard trellises. For very tall trellises (over 6-7 feet) or those supporting very heavy plants, or in loose soil, setting posts in concrete is highly recommended to ensure maximum stability.
Q3: My trellis is against a wall. Does it still need strong anchoring?
A3: Absolutely. A trellis leaning against a wall needs to be securely fastened at multiple points to prevent it from tipping or being pulled away by the plant’s weight or strong winds. Use durable wall anchors suitable for your wall material (e.g., masonry anchors for brick, toggle bolts for drywall, screws into studs for wood) and exterior-grade screws or heavy-duty brackets.
Q4: Can I use chicken wire or thin garden netting for a trellis?
A4: Only for very lightweight, short-term annuals like peas or small cucumbers. Chicken wire rusts quickly and is too flimsy for most climbing plants. Thin plastic garden netting often breaks under the weight of mature plants and can entangle and damage vines. Opt for heavier gauge galvanized wire or strong nylon/polypropylene netting, always strung tautly between robust, well-anchored posts.
Q5: How often should I inspect my trellis for damage or weakness?
A5: You should inspect your trellis at least once a season, preferably at the beginning when plants are small, and again mid-season when they are at their peak growth and heaviest. Look for loose connections, cracks in wood, rust on metal, or signs of the trellis shifting in the ground. Early detection allows for repairs before a full collapse.
Conclusion
Watching a beloved plant thrive, supported by a sturdy, well-designed trellis, is one of gardening’s quiet joys. Conversely, wrestling with a collapsed structure and damaged plants is a source of profound frustration. The difference often lies not in luck, but in forethought and a deeper understanding of the forces at play. By truly assessing your plant’s needs, committing to proper anchoring, choosing durable materials, and executing sound construction, you can build or select trellises that stand the test of time, weather, and vigorous growth. Embrace this strategic approach, and your climbing plants will thank you with season after season of beautiful, abundant displays. Happy climbing!